

October 2, 2026

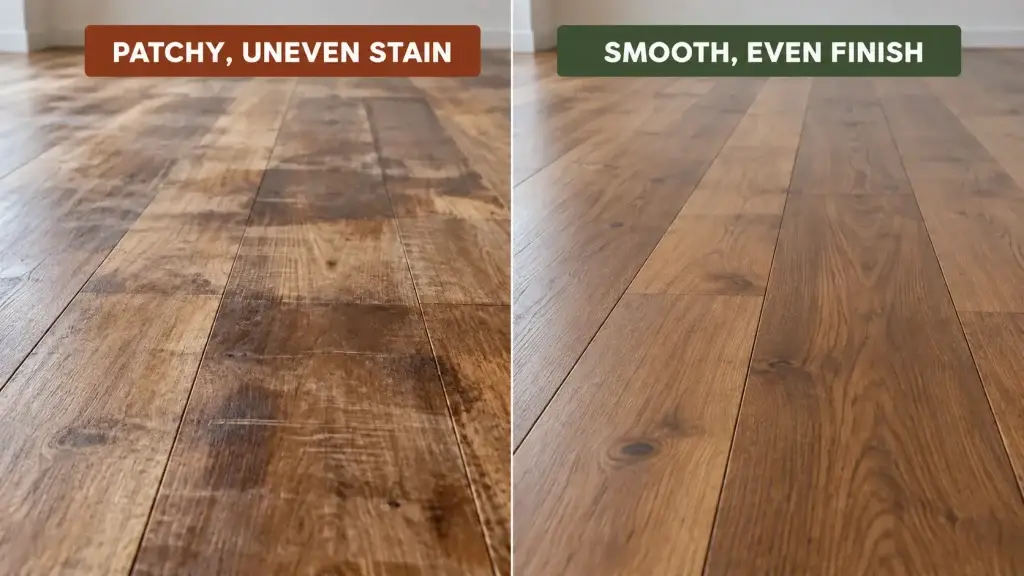
A timber floor can look perfectly even before the stain touches it. Then the colour goes on, and the differences appear. One board turns dark, another stays pale, and faint sanding marks suddenly stand out.
The stain may get the blame, but patchy colour often begins much earlier. Successful timber floor staining depends on the timber, the sanding and the way the stain is applied. Get those details right and the grain comes alive. Get them wrong and every small flaw becomes easier to see.
The secret to even timber floor staining is consistent preparation. Sand the whole floor to the same standard, remove all dust, test the stain on the actual timber, and apply it evenly without letting edges dry. Uneven sanding, absorption or application can leave patchy colour.
Timber is a natural material. Each board has its own grain, colour and level of porosity. Some areas absorb more stain than others.
This natural variation gives timber its character. However, uneven preparation can make those differences far more obvious.
Common causes of patchy floor staining include:
The stain doesn’t hide the surface beneath it. In many cases, it reveals it.
Good timber floor staining starts with the right equipment. The exact tools will depend on the timber, stain and coating system, but most projects require:
Check the stain’s current Technical Data Sheet before choosing applicators, pads or sanding grades. Using the wrong tool can affect how the timber absorbs colour.
If you want to know how to stain timber floors well, start with the sanding.
Every part of the floor should be sanded to the same standard. If one area is smoother than another, it may absorb less stain. Deep scratches can also hold more colour, leaving visible lines once the floor dries.
Edges and corners need special care. They’re often sanded with different machines, so their scratch pattern may not match the main floor.
Before staining, check the floor in good light. Look across it from several angles. Marks that seem minor on bare timber can become much darker after staining.
Check for raised fasteners before the final sanding stage, and punch exposed nails below the surface where appropriate. Any repairs should use a filler confirmed as compatible with the chosen stain and coating system, as some fillers may absorb colour differently from the surrounding timber.
A small colour sample can prevent a very large disappointment.
The final shade can change with the timber species, grain, natural colour, porosity and sanding method. A sample shown on a screen or colour chart can only give you a guide.
For the most useful result, prepare the test area in the same way as the main floor. Use the same sanding sequence, stain and planned finish.
Then let the sample dry before making your decision.
This is especially important when mixing colours. LOBA ProColor shades can be mixed, while ProColor Transparent can be used to lighten the colour. Record the mix carefully so it can be repeated across the entire floor.
Floor staining is easier when the whole job is planned before the tin is opened.
With many timber floor stains, it helps to divide the floor into sections that can be completed without long pauses. Use natural breaks, such as doorways or room transitions, where possible.
Avoid stopping in the middle of an open area. If one edge begins to dry before the next section meets it, a visible overlap line may remain.
Portcork’s LOBA ProColor has a relatively long open time, giving the applicator more time to spread and equalise the stain.
Use a steady method across the room. Sudden changes in the amount of product, pressure or working speed can affect the colour.
Make sure the stain is evenly mixed and follow the current Technical Data Sheet for the correct tools, application rate and working method.
Stain can collect near walls, corners and door frames. These areas may become darker if excess product isn’t worked out evenly.
Good lighting helps. Check each completed section from more than one angle before moving on.
Don’t rush to apply the protective finish.
The stain must be dry before the next coating stage begins. Drying conditions can change with temperature, airflow and the condition of the floor, so always follow the current product instructions.
Doing the work yourself may reduce labour costs, but the stain is only one part of the total price. You may also need to pay for:
Mistakes can also be expensive. Patchy colour, sanding marks or dark overlaps may require the floor to be sanded again.
Before deciding, compare the full DIY cost with a professional quote. A flooring professional brings commercial equipment and experience with sanding, colour testing and application. For a small, simple area, DIY may be practical. For a large or highly visible floor, professional timber floor staining may offer better value and a more consistent result.
LOBA ProColor Stains are solvent-based, low-odour stains made for the professional staining of parquet and hardwood floors.
They are particularly suited to coarse-grained, ring-porous hardwoods such as oak and ash. On fine-grained timber, sanding marks and uneven preparation may become more visible, which makes careful sanding especially important.
Once the stain has dried, it must be coated with a compatible protective finish. Check the current Technical Data Sheet before choosing and applying the coating system.
The stain provides the colour. The finish above it provides the surface protection.
Seeing the process can make the finer details easier to understand.
Watch Portcork’s LOBA ProColor Stain Demonstration to see practical tips for working with the stain and creating an even result.
Pay close attention to:
Water-popping involves lightly moistening bare timber to raise the grain and help it accept more stain. It can intensify colour on dense timber, but uneven moisture may create darker patches, so it should only be used with the correct product guidance and application experience.
The video is a useful guide, but every floor is different. Always check the latest Technical Data Sheet and test the full coating system before starting the main area.
Good timber floor staining shouldn’t cover the character of the wood. It should help you see it.
The secret is simple, even if the work takes care: sand consistently, test the colour and plan the application before you begin.
Explore LOBA ProColor Stains or contact Portcork for help choosing a stain colour and compatible finishing system for your floor.
Often, yes. The old coating usually needs to be removed so the stain can reach the timber evenly. The floor should first be checked to confirm that it can be safely sanded and refinished.
Timber species, grain, natural colour, porosity and sanding all affect the result. Even boards from the same species can vary. Always test the stain on the actual timber before staining the full floor.
Stain mainly changes the colour. It isn’t a complete protective coating on its own. After the stain has dried, apply a compatible finish according to the manufacturer’s instructions.