

September 16, 2026
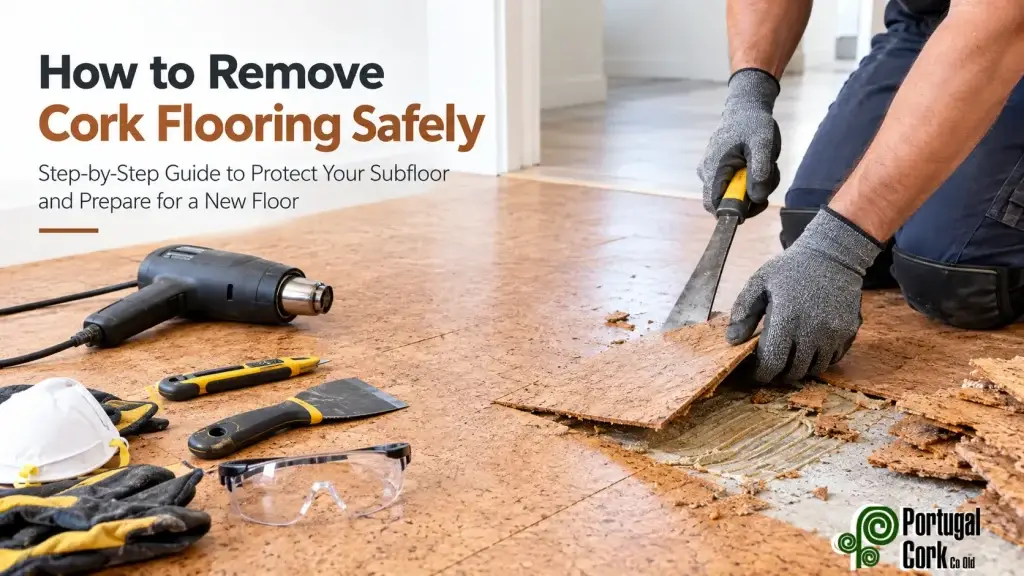
An old floor can hide more than you expect.
Lift one loose corner and you may find smooth concrete, worn timber, plywood or a stubborn layer of adhesive. What lies underneath will shape the whole job.
If you’re wondering how to remove cork flooring, don’t start by pulling up every tile blindly. In this guide, we will walk you through the tools you need, a step-by-step removal process, and how to prep your specific subfloor for a brand-new installation.
Some older flooring systems and adhesives may contain hazardous materials such as asbestos that require professional testing and removal. Their age or appearance alone cannot confirm whether they are safe.
Before disturbing an old floor:
Do not sand, grind or mechanically disturb unidentified flooring or adhesive. If you’re unsure, stop and contact a qualified professional.
The next question is simple: how is the floor attached?
Some cork tiles are bonded straight to the subfloor. Others may have been installed over plywood, underlay or an older surface. The strength and type of adhesive can also vary.
Once the flooring and adhesive have been confirmed as safe to disturb, test a small area near a doorway or loose edge. This may show whether the cork lifts cleanly or breaks into pieces. A small test can reveal a great deal before the real work begins.
Before you begin, gathering the right tools will make the job safer and significantly easier. Depending on how firmly the cork is glued down, you will likely need:
Once you have confirmed your floor contains no hazardous materials like asbestos, you can begin the physical removal process. Work methodically to protect the subfloor beneath.
Clear all furniture from the room. Remove the baseboards or shoe molding around the edges of the floor using a pry bar, taking care not to damage the walls. This exposes the edges of the cork tiles, giving you an easy place to start.
Wedge your floor scraper or putty knife under the edge of the cork at a low angle (around 30 to 45 degrees). Apply steady, even pressure to pry the cork up. If the adhesive is old and brittle, the cork may pop off in whole tiles. However, it is very common for cork to crumble or break into smaller chunks as you scrape.
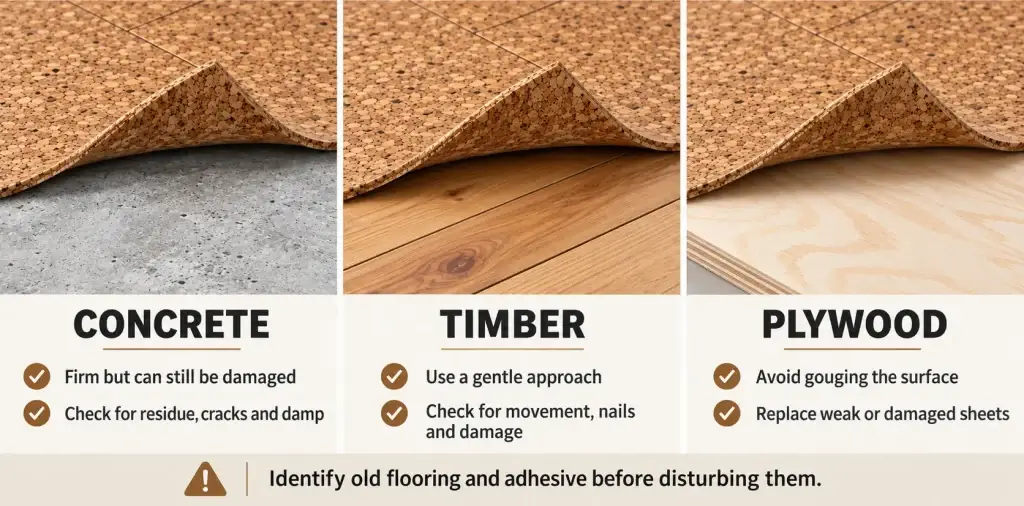
Concrete is firm, but its surface can still be damaged.
When scraping the tiles up, keep your scraper at a low angle to reduce the risk of digging into the concrete. Avoid forcing up difficult sections; aggressive removal can gouge the slab and create more preparation work later.
After removal, inspect the slab for:
Timber and plywood need a gentler approach.
A sharp tool can easily gouge a wooden surface. Too much force may lift wood fibres or damage the boards beneath the cork. Work slowly, rely heavily on your heat gun to soften the glue, and begin where the flooring is already loose.
Watch for nails, screws and movement in the subfloor. Damaged plywood may need repair or replacement before a new floor is installed. The aim isn’t simply to remove the old cork. It is to leave a sound surface behind.
Removing the tiles may be only half the job.
Old adhesive can remain in ridges, patches or thin films. New flooring needs a clean, dry and level base, so the residue must be assessed before installation begins.
The correct removal method depends on the adhesive and the subfloor. You may be able to gently scrape it away once softened with heat, or you may need to manually dissolve flooring adhesive. Don’t use a chemical remover, grinder, or sander until the material has been identified and the product instructions confirm that the method is safe and suitable.
For unknown or difficult adhesive, professional advice is the safest choice.
Once the old material is gone, inspect the entire surface in good light. A suitable subfloor should be:
Cracks, low areas and damaged boards should be repaired with products suited to the subfloor. Explore Portcork’s levelling compounds and confirm product compatibility before use.
Good preparation may take longer than expected, but it protects the floor that comes next.
Not always.
The subfloor may need cleaning, repairs, levelling or moisture testing. The room conditions and new flooring may also need time to adjust before installation.
Always follow the supplier’s instructions. They should explain the required subfloor condition, room conditions, protective finish and whether any timber or cork adhesive is required. Cutting this stage short can affect how the new floor bonds, looks and performs.
Knowing how to remove cork flooring is only the beginning. The quality of the next floor will depend on what happens underneath it.
Once the subfloor has been inspected and prepared, explore Portcork’s Standard Cork Tiles for your renovation. Contact the Portcork team for help with product selection, quantities and installation requirements before placing your order.
Call a professional if the flooring is old (risk of asbestos), the adhesive is unknown, the subfloor is damaged, or the removal method is unclear and proving too difficult to do by hand.